15 Creative Wall Texture Types and Easy DIY Methods
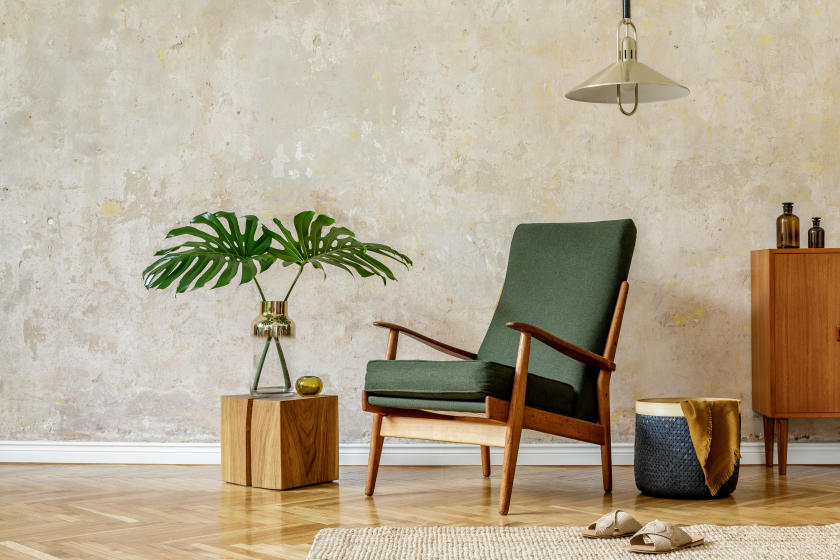
Imagine walking into a room where the walls are dramatic with intriguing wall textures. Walls play a very significant role in shaping an ambiance and visually appealing aesthetics to the place.
Wall textures do not just add depth to the wall but also add unique personality and interest. From rustic brick patterns to chic dual-tone ombre walls, there are numerous textures that bring life to the walls.
In this blog, let’s delve into the best wall textures and how to create them. Discover tools and techniques that will help you transform plain walls into creative pieces of art.
Get ready with those fine brushes to paint your favorite colors.
1. Venetian Plaster Texture

Venetian Plaster, which originated in Venice, is a blend of lime plaster and marble dust. It is known for its natural stone look, which gives a rich and aesthetic vintage castle look to your home. Here’s the step-by-step process to create Venetian Plaster wall texture.
- Mix the Venetian Plaster, and follow the instructions provided on the package. Usually, it is mixed with water to form a smooth, creamy consistency.
- You can also add tinted colorants for a specific color. (optional)
- Apply a thin, even layer of the first coat with a trowel; it is recommended to maintain the same consistency in pressure to form an even layer.
- Let it dry completely, and gently sand the surface with a sandpaper of grit between 100 to 220.
- Repeat the same process 3 to 5 times; you can achieve a smooth surface by burnishing after the final coat.
- To enhance durability, you can apply sealer, which is specially made for plaster surface sealing. (optional)
2. Skip Trowel Texture

Skip trowel texture is one of the most common choices used in house renovation as it adds visual interest and covers the imperfections on the wall. It can be easily achieved by applying thin layers of joint compound and by creating patterns using a trowel.
Here’s how you can create a skip trowel texture.
- If you are working on a new wall, consider sanding and wiping away the dust and dirt from the wall. If you are working on an old wall, it is recommended to apply primer to cover the pore.
- Once the wall is prepared, mix all-purpose joint compound (dry or ready to use) till you achieve smooth & creamy consistency.
- Take the mix into a shallow tray to make it easy to scoop using the trowel.
- Visually divide the wall into 2 parts and start from the bottom of the wall.
- Apply a thick layer mix using a skip trowel for a more visually appealing texture. Once you applied the mix, now make patterns by arching the trowel in 15 degrees short strokes.
- If there are any corrections, rework them before the mix sets. Let the wall dry for at least 24 hours for a finished look.
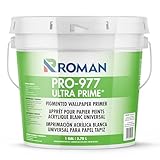
- IDEAL DRYWALL PRIMER - ROMAN White Acrylic Primer is excellent for priming over bare drywall and...
- STRIPPABLE AND TINTABLE - PRO-977 Ultra Prime Wallpaper Primer promotes strippability, helping...
- EASY TO USE - No matter what your project or skill level is, ROMAN Wallpaper Primer will yield...
- DURABLE - PRO-977 White Primer is specifically formulated to protect the wall during double-cutting...
- PREMIUM QUALITY - ROMAN Products has a long-standing successful record in personal and commercial...
3. Orange Peel Texture

Orange Peel Texture is the most common texture since it is easy to apply and maintain. It is named orange peel because of its resemblance to the texture of orange peel. This texture gives a uniform finished look, which helps hide imperfections on the wall.
Here’s a step-by-step process to create orange peel wall texture.
- Apply primer if there are any cracks or open pores on the wall. If not, primer is completely optional.
- Mix the dry joint compound with water to achieve the desired consistency, or you can purchase a ready-to-use mix, which is made specifically for the orange peel texture.
- Based on the texture size, you can choose the nozzle; if you want heavier texture, you can go for 8mm, and for fine texture, you can choose the smaller one.
- Pour the mix into the hopper of the air texture spray gun and start spraying; make sure you do it from at least 18 inches away from the wall. Once you are done, skim the high spots with small tools like a drywall wall knife, trowel, etc.
- AIRCRAFT-GRADE ALUMINUM (NO FLEX!): Unlike plastic blades that bend and warp, our skimming blade...
- PRO-GRADE 301 STAINLESS STEEL: Experience the perfect blend of strength and flex. Our 0.34mm 301...
- SUPERIOR LAP MARK REDUCTION: The precision-rounded skimming blade edge minimizes lap marks on large...
- ERGONOMIC COMFORT & CONTROL: The comfortable, ergonomic grip enables wrist-friendly handling,...
- BUILT TO LAST & EASY CLEAN: 22-inch skimming blade is esigned for professionals who value...
4. Slap Brush Texture

Slap brush texture is a decorative wall structure that adds visual interest and covers the imperfections. This texture is also known as crows’ foot or stomp texture, which can be easily achieved without any professional help. Here’s how you can do it!
- Mix drywall mud or joint compound with water till you get the desired pancake batter consistency.
- Take a paint roller (you can add an extension if needed), dip it in the mud, and roll it over the wall in thin, even layers.
- Stamp the surface with a slap brush, it is advised to stamp once, but if you are aiming for overlapped patterns, then you can do it till you achieve the desired texture.
- Let the wall dry for at least 24 hours, and paint the wall with desired colors.
5. Knockdown Wall Texture

Knockdown Wall Texture is a popular texture created by using unique tools to create visual effects on walls. This process is easy and similar to the orange peel texture.
Here’s how you create a Knockdown wall texture.
- Mix the dry joint compound with water to achieve the desired consistency, and add the mix to the hopper of the air spray gun.
- Spray the mix based on your desired texture and let it dry slightly for at least 10 to 15 minutes, and knock down the texture with a knockdown knife. It is recommended to use uniform pressure.
- You can also achieve this texture using a textured roller painter.
- Let it dry for at least 24 hours, and paint the desired color.
6. Dash Stucco wall texture

Dash Stucco, also known as Roughcast, Dash Finish is a texture that creates a deep visual interest with uneven, bumpy texture to the wall. One can use aggregates like shells, small pebbles, and pea gravel to the mix. Here’s the overview of the process.
- Prepare the mud using Stucco mix and water to form a consistent mix that is workable.
- Using a trowel, apply a thick layer of mud on the wall, making the layer at least ¼ inch to ¾ inch thick.
- When the base coat is still wet, mix the aggregate with a small amount of stucco mix and throw it forcefully onto the wall. Repeat the same process over the entire wall.
- After completing the process, use the trowel and lightly press the surface to embed the aggregate securely, which creates a uniform appearance on the wall.
- Moist the wall by misting, which helps cure the surface. You can seal or paint the wall after curing to enhance the durability of the texture.
- REPAIR ANY STUCCO FINISH — The Ready-Mix Stucco Patch is highly versatile for patching and...
- TOUGH & DURABLE — This stucco patch is acrylic-based and textured, so it dries to a tough,...
- EASY TO USE — It comes in a 1-qt container that covers approximately 20 sq. ft. at 1/32 in. You...
- VOC-COMPLIANT — This product meets all government regulations to maintain safety and health...
- HOW TO APPLY — Clean and prepare the surface, apply the product with a trowel or putty knife, and...
7. Sand Swirl Texture

Sand swirl texture is a decorative finish used for walls to add visual interest. As the name suggests, the texture resembles the patterns of sand swirls and waves. Here’s how you can create a sand swirl texture on your wall.
- Mix the joint compound with water to attain the right consistency. Add fine grain sand for a sandy appearance; start with a small amount and gradually increase for the desired finish.
- Take a trowel and apply a thick layer of mud on the wall; make swirls (arches, interlocking C shapes) before the wall dries.
- Let the wall dry and paint the desired color.
- It might be hard for beginners to achieve swirls, better practice on a smaller surface.
8. Popcorn Texture

Popcorn texture also known as Acoustic or cottage cheese texture, is the most commonly used texture for walls and ceilings. Though it looks similar to orange peel, there is a very distinct difference in appearance and application. Here’s a step-by-step process of creating popcorn texture.
- Mix the dry joint compound with water, and make sure the mud is of thick consistency for a heavier texture.
- Spray the mud on the wall using an air spray gun from a consistent distance and let it dry.
- Use a knockdown knife to enhance the uniform texture of the wall.
Test it on a smaller surface before treating the larger surface.
9. Brick Wall Texture

Brick Wall texture creates a raw and aesthetically appealing rustic look to the place. Creating this texture is a combination of painting techniques and texture tools. Here’s the step-by-step process to do it.
- Mix the mud for the base coat, use a light or neutral color base, and let the coat dry completely.
- Take a narrow brush and draw the outline of the bricks, making irregular lines to mimic the nature of the bricks. Once you are done with the outlines, use brick color paints like red, brown, and earthly tones to fill in.
- You can use sponges, stencils, or rags to create texture. To create a finished look, distress the paint using sandpaper.
Let the paint dry completely before applying a sealant.
10. Faux Leather Wall Texture

If you are looking for rich and dark walls, then faux leather wall texture is the perfect choice. Faux Leather gives a dark leather-like texture to the wall with just paint and a couple of plastic bags and cloth rags. Here’s the step-by-step process to do it.
- Apply primer to repair the wall and let it dry completely.
- Mix the latex paint of your choice (it is recommended to use the neutral color of the leather to serve as background), with water and form an easy, consistent mud.
- Using a wide brush, apply an even base coat.
- Now dip a well-rolled/ crushed tissue paper or plastic paper in leather latex paint and dab it on the wall to create the texture.
- Take a darker shade of the lather latex paint and repeat the same process to create an overlapped dual-tone texture.
Do not apply pressure while dabbing the paper on the wall to avoid a smudgy finish.
11. Sponge Wall Texture

Sponge Wall Texture is one of the easiest textures to create. This texture not just adds depth and complexity but also helps conceal the wall. Here’s how you can do it.
- Choose a neutral coat and apply the base coat and let it dry for at least 24 hours.
- Choose a contrasting color for the topcoat to create the texture. Apply the topcoat using a textured sponge, just by dabbing gently. This is when you can be creative with patterns and designs.
It is important to make sure that the sponge is always damp and works from top corner to bottom. You can also create a multi-layer sponge texture using different colors.
- 7-PC VALUE PACK: Natural & synthetic sponge assortment providing variety of sizes, textures and...
- VERSATILE USE: A variety of textures make these sponges perfect for texturing, faux finishing,...
- HIGH-QUALITY SEA SPONGES: Naturally strong and long-lasting, these sea sponges have a porous...
- IDEAL FOR UNIQUE EFFECTS: Silk sponges provide soft blending and smooth shading, while yellow, wool,...
- NATURAL PRODUCT & KIND TO THE ENVIRONMENT: Genuine unbleached sea sponges responsibly harvested from...
12. Ombre wall Texture

Ombre wall texture creates a dreamy transitioning color effect to the wall, which gives a rich and artistic look to the room. Here’s how you can create a dramatic wall with two or more two colors.
- Determine the flow of the colors, like the dark color on the top or lighter color on the bottom or any other neutral color in the middle. Mark the visible separation using a pencil.
- Paint the base coat using neutral colors, which act as a background.
- Apply the color you chose for the top and work your way down and end it 1 inch away from the line. Work your way up to the darker shade and leave a 1-inch gap below the pencil line.
- Now blend the paints to create a smooth transition effect. You can even choose another color to blend.
13. Spanish Lace wall Texture

Spanish Lace Wall texture is one of the most ornamental and challenging wall textures to create. Here’s how you do it.
- Mix the joint compound and apply a coat, at least 3 mm thick, to the wall.
- Use a texture brush to create a lace-type structure on the wall. You can create overlapping textures to create more texture to the wall.
- Let the paint dry completely; if needed, use sandpaper to create a fine finish.
14. Comb Wall Texture

Comb wall texture brings a groovy look to the room. This can be easily created, and the name comes from the signature comb-like patterns that are created by the tooth of the trowel. Here’s how you can do it.
- Mix dry joint compound with water for a thick consistency.
- Take a trowel with teeth and create symmetrical patterns, arches, rainbows, and fish-scale patterns.
- Let the mud dry and sand it to level the deep valleys and paint the desired color.
15. Rosebud Wall Texture

Rosebud Wall texture is a decorative wall texture that resembles rose petals and curved patterns on the wall. Here’s the step-by-step process to create it.
- Mix dry joint compound with water for a thick consistency.
- Just when the wall is wet, use a round stomp brush to create texture. Press the brush against the wall and pull it straight off.
- Let the mud dry and sand it to level the deep valleys and paint the desired color.
- SINGLE ROUND - LESS HANDLE
- SINGLE ROUND - LESS HANDLE
- SINGLE ROUND - LESS HANDLE
- SINGLE ROUND - LESS HANDLE
- SINGLE ROUND - LESS HANDLE
Conclusion
Walls are not walling anymore; they are plain canvases that transform your room into a piece of art. The textured walls add personality and depth to the walls; from Spanish lace texture to sand swirl texture, you have a whole world for your walls. We hope that this blog helps you find the right texture for your wall.
Remember, mastering wall texture is not just a skill; it’s about expressing your creativity and embracing imperfections. It is important to keep yourself safe using rubber gloves, goggles, and face masks. Do not forget to cover the ground and furniture around the wall to avoid damage due to paint splatters.
With vision and creativity, you can create a beautiful wall with intricate textures and patterns.


