How to Make DIY Roman Shades With or Without Dowels

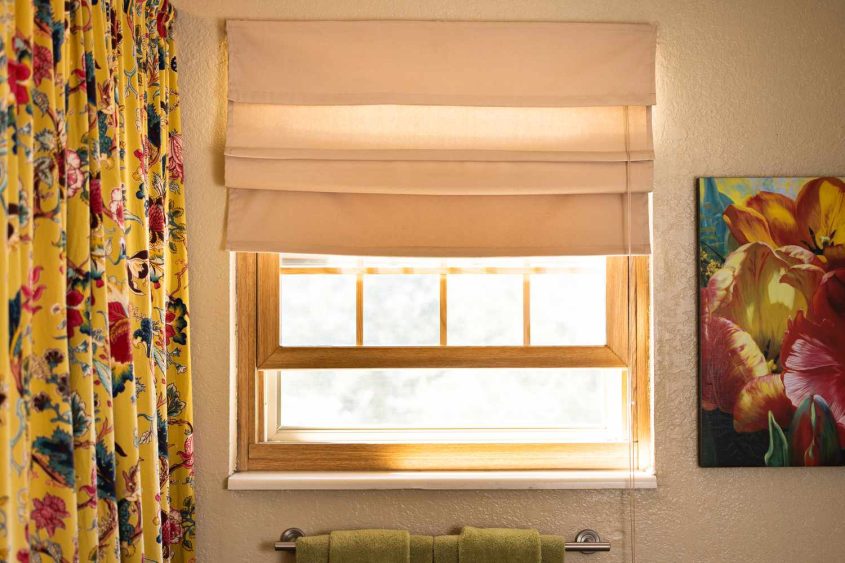
Roman shades are one of the most sought-after window treatments that can uplift your room decor manifolds. If you are thinking of decorating your window that allows proper sunlight inlet and doesn’t cost a fortune, making your own Roman shade is your best bet.
Making a Roman shade may initially appear complicated, but if you have a fine level of tailoring skill and some time to spare, you can totally DIY it at your home. It would also be a perfect way to showcase your creativity. With our easy and comprehensive guide, it would be quite easy for you to make your Roman shades with or without dowels.
So, get ready as we bring you a step-by-step DIY Roman shades guide to help you craft beautiful Roman shades that will garner a lot of attention.
The Difference Between Roman Shades with And Without Dowels
Before making Roman shades for your window, you need to understand what kind of shades you would choose. The key difference between Roman shades with and without dowels lies in their structure and functionality.
Roman shade with dowels has rods or dowels sewn into the fabric, which gives it a more crisp and stable appearance. Needless to say, they are a little more difficult to make than the ones without dowels.
Roman shades with dowels appear more neat owing to the defined horizontal folds created by dowels. On the other hand, Roman shades without dowels offer a casual and informal look, as there is no structure to support the cloth. They are also usually referred to as ‘waterfall style’ due to the absence of dowels.
So, suppose you are looking for an easier arrangement that lets you have the benefits of Roman shades without spending more time and effort. In that case, you can choose the Roman shades without dowels, and if you prefer a neat and structured look and have more time to spare, you can make Roman shades with dowels.
How to Make Roman Shades for Your Home?
DIY Roman shades are quite popular for decorating windows. It’s also a fun and fulfilling experience for people who love crafts. So, if you are one of those creative people, let’s dive in to create a stunning Roman shade for enriching your room decor.
1. Materials and Tools Required
- Fabric
- Lining fabric
- Threads in matching colors
- Piping
- Roman shade rings
- Screw eye rings
- Nylon cord
- ¼ inch dowels (if you are choosing *with dowels) in the same width as your window
- 1-½ inch dowel of the same width as your window
- 1”-2” Mounting Board
- Blind cord safety cleat
- Screws
- Needles
- Small drill bit
- 1.5” corner braces
- Sewing machine
- Scissors
- Measuring tape
- Stapler
- Iron
- Drill
2. Measurement of The Window
Measuring your window is the first step in making Roman shades. Roman shade can be installed in a window in two ways. The first one is where the Roman shade fits inside the window, and the second one is where some wall space is used.
Inside the Window Frame Measurement

- Measuring the width of the window: To get the accurate width of the window, you need to measure the inside edge of the left side of the window to the right side of the window frame. Measure the top, middle, and bottom of the window. Ideally, all the measurements should be the same. You should choose the smallest measurement out of three and subtract ⅛” from it. The result is the final width of the window.
- Measuring the length (height) of the window: For measuring the length of the window, you need to measure the length between the top of the window frame all the way down to the bottom. If you have a window sill, extend it till there. Repeat it three times, once for the left side, once for the right side, and lastly from the center. The largest of these measurements is the final height/ length of the window.
Outside the Window Frame Measurement

- Measuring the width of the window: For measuring the width outside the window, start measuring the width from the left side of the outside edge of the window and go all the way to the right side of the outside edge of the window. Repeat it 3 times, just like the earlier measurement, once from the top, once from the bottom, and lastly from the middle. Go with the largest measurement you have got and add approx 4” to it; this is the final width of your shade.
- Measuring the height of the window: Lastly, you have to measure the height of the window. Start measuring from the top of the frame and measure up to the window sill or the inside edge of the bottom, whichever is the case with you. Repeat this three times, once from the left, once from the right, and once from the middle. Take the largest of these measurements and add approx 2” to it. The final length is the result of this addition.
3. Measurement of The Fabric
After a meticulous calculation of the length and width of the window, you need to find the measurement of the fabric that you have chosen to make Roman shades for your window. Let’s see how to do it.
Measuring the Fabric Length for Roman Shades with Dowels

If you are using dowels for Roman shades, you need to choose the number of dowels you will be using beforehand; the length of the fabric will depend on the number of dowels. The dowel is usually 1.5”, so it adds 1.5 inches of fabric. If you are going with adding dowels every 8 inches, you need to divide the window length by 9.5 as (8+1.5= 9.5) to get the number of dowels.
You can use a simple formula for calculating the fabric length in this case.
Height of the window + 1.5 inches X number of dowels + 4 inches
Measuring the Fabric Length for Roman Shades without Dowels

If you are not going to use dowels for your DIY Roman shades you can simply add 4 inches to the length of the window. So, if the window length is 50 inches, you will need 50” + 4”= 54” long fabric.
Calculating the Fabric Width
Calculating the fabric width is quite easy; just add 4 inches to the width of your window, and you will get your fabric width. If your window is 30” wide, you will need a fabric that is 30”+ 4”= 34” wide.
Measurement of Lining Fabric
For the width of the lining, you need to simply subtract 2” from the width of your. For example, if the width is 30”, the width of the lining will be 28”. Similarly, for calculating the length of the lining, you need to subtract 1 inch from your final fabric length. In our case, according to the above calculation comes to 61.5 inches. So the length of the lining will be 60.5 inches.
4. Cutting and Sewing of The Fabric

According to the above calculations, start cutting the fabric along straight lines. Sew the fabric and lining. Iron it to remove the wrinkles. Now fold and press the edges of the fabric to create hems.
Make sure your bottom hem is wide enough to accommodate the dowel if you are creating the Roman shades with dowels. If you want a more professional finished look, add the piping on the top part of the shade and sew it along the width of the fabric.
Now you have to place the shade on a leveled surface and figure out the places of the plastic rings. Make sure that the rings are placed equidistant from each other. After marking the distance of each ring start sewing them along the bottom seam line of the shade.
The first marking should be about 1 inch away from the edge of the fabric at the bottom seam line. Continue sewing these rings along the length of the fabric. Now repeat this row of rings for the entire length of the fabric.
5. Preparing and Attaching the Board

Take the 1”-2” mounting board and cut it in a way that its width remains the same as the width of the shade. Wrap the clothing along the width of the board to give it a neat look. Make sure your piping is attached just on the top edge of the mounting board.
Now fix the eye hooks along the width of the prepared mounting board at the same distance as the rings. Ensure that your shade looks proper when you hold it vertically; it is almost ready to be used.
Start the process of attaching the cords. Firstly you need to cut your cord into equal lengths. To figure out the exact length of the cord just add 60” to the sum of the width and length of your. In this example, we have taken the width as 30” and the length as 50”, so the cord will be 30”+50”+60”=140” long.
Now pass the cords through the rings in a straight line making sure that their ends are grouped on one side of the mounting board. Confirm that cord 1 goes through eye hook 1, and cord 2 goes with eye hook 2, and so on. In the end, the last cord should pass through each cord, i.e., the 4th one will pass through eye hook number 4, then through eye hook number 3, then 2, and then 1.
6. Hanging your DIY Roman shade

Lastly, you need to hang your DIY Roman shade on your window. If you want to hang the shade inside the window frame, use screws to attach your mounting board in a way that the piping is aligned with the mounting frame’s edge.
If you have decided to hang your Roman shade outside your window frame, attach the 1.5” corner braces to the wall. For a wide window, you may need to add extra brackets to keep the mounting board upright. Add an eye hook on the wall and pass all the cords through it. Attach the blind cord safety cleat to wrap the excess cords.
Conclusion
We hope by now you must have understood all the minute details of creating a DIY Roman shade for yourself. Although the process is a bit tedious and requires extensive detailing, if you follow each step meticulously, the results could be very rewarding.
There are a few things that need to be taken into consideration while creating a DIY Roman shade, such as correctly measuring the lengths and widths, placing rings, ensuring neat edges, and using all the tools carefully.
So, embark on your creative journey with our step-by-step guide to making your own Roman shade and transforming your space into a stylish and inviting spot.


