Easy Step-by-Step Guide on Painting Gingham Patterns on Ceilings
In the wake of fashion and interior design, the gingham pattern has firmly stood the test of time with its super amusing characteristic grid of alternating colorful stripes. It enhances the visual appeal and dimension of any place, wherever it is invested.
Gingham has its roots associated with Southeast Asia, which first became fashionable in the European Context in the late 17th century.
Gingham’s basic yet exquisite charm has made this style extremely popular in fashion and home decor for several decades. Now at the center of the idea of home decor, it is immensely hitting the trend among people who are widely resorting to incorporating this style.
And if you are also among those who are trying to have it in your home but in a complete state of mess, how to begin with? Then this is your time to get all your queries answered. In this article, we have presented a detailed idea to amplify your home’s serenity by bringing the gingham pattern on your wall’s ceiling to life.
Gingham Pattern: An Overview

- In layman’s terms, a grid of alternating colored stripes, generally in two colors, creates the timeless and traditional pattern known as gingham. It has the immense power to turn a plain ceiling into the center of vibrant attraction. The Gingham is extremely popular for its wide adaptability. It comes in a variety of colors and sizes, making it extremely popular for apparel, home decor, and even the areas associated with your daily foods, tablecloth, or aprons.
- It is a great idea to carry forward if you are in a state of mess or unable to finalize which idea you must go with. This design creates a feeling of balance and order and brings a deep sense of formality and comfort. However, it does need a deep sense of cautiousness and attention to carry forward the style while proceeding ahead with this idea on the ceiling, especially when you have decided to do it all by yourself. It does need a deep sense of understanding while unleashing the inner artist from you to craft and recreate the look of your home in the best possible manner.
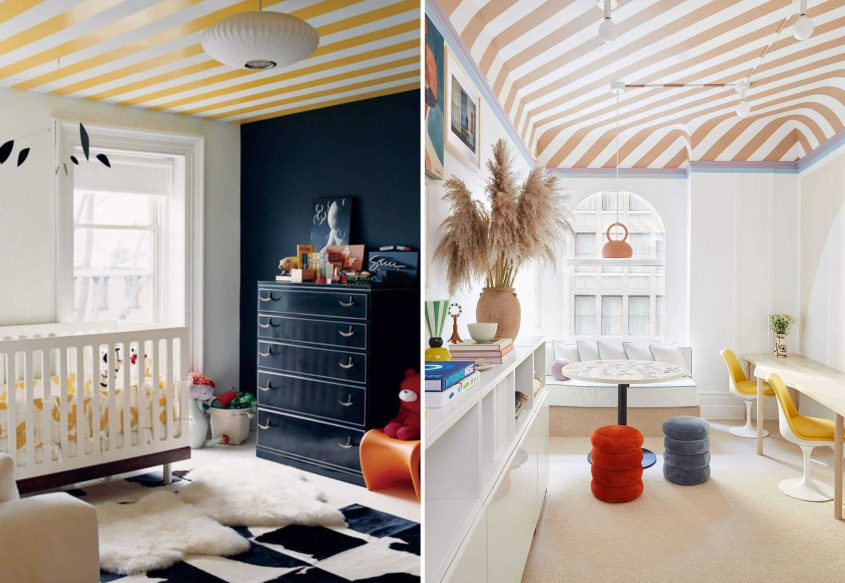
- It is time to apply this charming pattern to your ceiling to transform the disregarded surface into a compelling focal point that enhances the overall atmosphere of your interiors.
- Now without wasting much time, we will take you through a detailed journey of this artistic frame and every step involved in this complex yet crafty DIY home decor craft. Irrespective of whether you are a beginner or an experienced one, this reference will help you get through your very best project renovation until yet.
Essential Supplies Required to Paint Gingham Pattern on the Ceiling

Before we begin, it is essential to get your supplies ready to allow your creativity to the talking for you. Painting the gingham pattern will require a few essential tools to ensure the proper execution of the entire task from the beginning; here’s a detailed list of what you will need to get the job done in a flawless manner.
- Measuring tape
- Chalk Line
- Ladder
- Paint Tray
- Paint Roller Frame
- Paint Roller Covers
- Extension Pole
- 2-Inch Foam Paintbrush
- 4-Inch Roller
- Safety Goggles
- Straight Edge
- Damp Rag or Sponge
- Paints (Your Choice)
Step-By-Step Guide to Paint Gingham Patternon Your Ceiling
Now that you have gathered all the supplies and committed to handing your interiors a sense of personalization with gingham pattern, here we present to you a detailed step-by-step guide to achieving the entire task with precision and in a hassle-free manner. However, before starting, make sure that you are well prepared throughout any home renovation job and fully loaded with the safety aspects, involving appropriate safety gear, such as goggles, a dust mask, and adequate ventilation. Now with all that having sorted, let us now get into the details without wasting much of the time.
Step 1: Prepare the Ceiling

- Upkeep of the Ceiling: For the paint to adhere correctly, the surface must be clean. Use a soft brush or a Hoover to clear the ceiling of any dust, debris, or cobwebs.
- Fixing and Replacing Defects: Look for any cracks or holes in the ceiling and fill them with an appropriate filler. Patched portions should be smoothed off using sandpaper.
- Ceiling Priming: By using a primer, you may improve the ceiling paint’s adhesion and get a more uniform finish. Apply the primer with a roller and allow it to dry as directed by the manufacturer.
Step 2: The Gingham Pattern’s Preparation

- Using the Correct Colours: Choose two colors that are complementary to one another and the color scheme of your room. Colors with bold shaded bring drama and intensity, while lighter tones frequently give off a more gentle and airy vibe.
- Determining the Size of the Gingham Pattern: When choosing the gingham pattern’s size, take into account the room’s proportions and ceiling height. While smaller designs are great for cozier places, larger patterns may fit rooms with lots of space.
- Making a Sketch: Make a prototype or sketch of the gingham pattern on paper or with a digital design tool before you start painting. You may see the final result and make any required edits using this.
Step 3: Choosing the Correct Tools and Materials

- Types and Finishes of Paint: Opt for ceiling-safe interior paint of the highest grade. Gingham patterns often look best with matte or satin surfaces because they minimize glare and draw attention to the pattern’s design.
- Brushes and Rollers: For a uniform and smooth application, use paintbrushes and rollers of superior quality. A fine-bristle brush is advised for the grid lines.
- Painter’s Tape: Painter’s tape will make drawing precise and neat lines easier. To protect the recently painted foundation, use painter’s tape on fragile surfaces.
- Drop Cloths and Protective Equipment: Drop cloths should be used to shield the furniture and floor from paint splatters. To avoid getting paint on your skin, put on the necessary protective clothing.
Step 4: Painting Procedure

- Marking the Grid: Using a pencil, a straight edge, or a chalk line, measure the ceiling and mark the grid lines. Make sure the lines are level and spaced equally.
- Taping off the Pattern: Mark the precise locations for the colored stripes with painter’s tape, leaving blank spaces for the base color.
- Painting the Base Colour: To the whole ceiling, including the areas designated for the colored stripes, apply the base color. For big areas, use a roller, and for edges and corners, use a brush.
- Applying the Initial Stripes: One pair of stripes should first be painted in one of the chosen colors. For crisp edges, use painter’s tape as a guide. Before continuing, let the paint dry.
- Painting the Second Set of Stripes: Use the painter’s tape to draw crisp, straight lines as you repeat the process with the second color once the first set of stripes has dried.
- Removing the Painter’s Tape: After the paint has dried, carefully remove the painter’s tape. To protect the painted surface, peel it off at a 45-degree angle.
- Refinishing the Edges: Check the gingham pattern’s edges for flaws or paint that has bled. To get a clean and glossy finish, touch up any places that require it.
Step 5: Apply Consistent Brush Strokes Tips Best Finish

- Looking Gingham Pattern: To achieve a smooth effect, use constant brushstrokes throughout the painting process.
- Maintaining Even and Straight Lines: The painter’s tape and a steady hand will assist in maintaining the lines uniform and straight, giving in a tidy and polished finish.
- Seamless Colour Blending: If the two colors overlap in any place, softly combine them to make the transition between them look seamless.
- Correcting Errors: Allow the paint to dry completely before attempting to fix any sort of errors. For getting optimal results, sand and refinish the damaged area well.
Alternative Gingham Patterns Techniques

There are other techniques in the lot associated with the execution of the Gingham Pattern as well. We have consolidated a few for you to help in your upcoming home renovation project; here are some of the ideas, which include:
- Faux Finish Gingham: Investigate faux finish methods to produce a gingham pattern that looks like cloth. Popular techniques for producing this appearance include sponge painting and ragging.
- Gingham Patterns Stencilling: Stencils make the operation easier and guarantee a uniform design over the ceiling. It helps you transform your boring and lame room interior into a formal look that also displays the finer character of your home’s overall get-up.
- Creating a Gingham Effect using Wallpaper: Consider utilizing gingham-patterned wallpaper as a quick and simple alternative to painting if it seems too tedious for you.
Maintaining and Caring for the Gingham Ceiling

The maintenance and the caring part of the gingham updated ceiling is another important aspect for you to look after if you have decided to proceed with the incorporation of the gingham pattern.
- Dusting and Cleaning: Dust the ceiling frequently to keep it bright and tidy.
- Managing Potential Damage: Use the proper cleaning methods or repaint the damaged area as soon as stains or damage are discovered.
- Refreshing and Repainting the Design: The paint may fade or deteriorate over time. Refresh the gingham pattern as needed by repainting it using the same techniques.
Additional Tips to Adhere While Dealing with Gingham Pattern

- Although meticulous attention to detail is necessary when painting a gingham pattern on the ceiling, the satisfaction of successfully completing this creative project is well worth the work. This guide gives you the tools you need to start a fulfilling path of creativity and self-expression, regardless of whether you are an accomplished artist or a DIY enthusiast.
- Gingham ceiling painting is a style of fine art that adds a fine sense of personality and charm to any room. Enjoy the process, embrace your imagination, and let your gingham ceiling serve as a showcase for your talent and hard work. Be patient with the process and gather your supplies, and head on to the renovation project to create a gingham masterpiece that will leave a lasting impact on everyone who enters your house. Have fun painting
- Don’t forget to give the ceiling surface the required preparation as detailed in the steps above to make the right color selections, and establish a mockup or drawing to see the finished design. Maintain firm brush strokes, accurate lines, and smooth color mixing throughout the painting process for a professional result. You may get spectacular results that are guaranteed to astound you by meticulously following the instructions and putting the supplied advice into practice.
Conclusion
A fantastic method to give your living room a timeless elegance and visual fascination is to paint a gingham pattern on the ceiling. We have examined the creative process in detail through this step-by-step manual, from preparation and planning to pattern creation. With the appropriate equipment, supplies, and methods, you can turn a plain ceiling into a compelling piece of art.
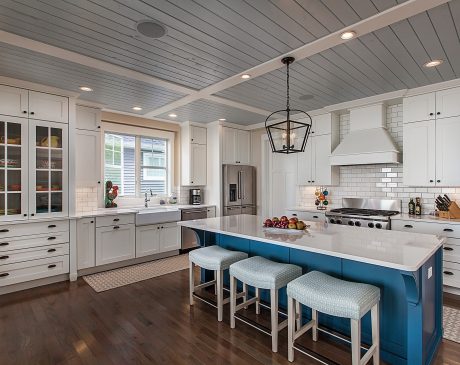
Because of the gingham pattern’s adaptability, you may customize the style to go with the concept and color palette of any space, whether it be a cozy bedroom, a fun kitchen, or a classy dining area. The contrasting color stripes add depth and complexity to the room, enhancing its overall attractiveness and serving as a striking focal point.
Remember to take careful care of your newly painted gingham ceiling while you enjoy its attractiveness. The design will remain vivid and new for years to come, with routine upkeep, cleaning, and touch-ups as needed. Don’t forget to share your experience of how you proceed to go with our specific guide.
Frequently Asked Questions
How to Deal with Variations in Pattern with Gingham Style?
Pattern Variations are a lot of experiments and are ideal while dealing with different gingham styles by adding a wide range of colors to achieve the desired look. You might also proceed with adding the diagonal gingham style for a unique and classy look for the interiors.
How to Measure and Mark the Squares with Precision?
It is extremely easy to go with the measuring part for the Gingham Pattern; begin with using the measuring tape to mark the ceiling at equal intervals along the edges. Bring the level and a pencil into use to draw straight lines that intersect, making a perfect grid.
How to Prevent the Paint Bleeding Under the Tape?
Proceed with making sure that you have got the base coat completely dry before you add the painter’s tape. After this step is done, press down the edges of the tape gently and firmly to create the seal.
Can We Use the Same Roller for Both the Colors?
We will never recommend proceeding with having the same roller for painting both colors, even after you have got the brush completely cleaned. Using the same brush first is a time taking process. Secondly, it will distort the finishing of the design, which will result in the mix-up, eventually leading to an ugly appearance.